Showing posts with label Mixed Media. Show all posts

Tuesday, September 8, 2015

Collectively Creative

If you have a principal like mine, two days into the new school year they're already asking, "so when are we getting some art up in the hallways?". Although I enjoy that art is wanted and encouraged in the hallway, I get a little WAHHHHHH with the idea of having something up almost immediately.

So this year I took on the challenge and I did it! I got art in the hallway four days into school and it was great! The hallways are so colorful and now we can take our time getting new projects ready for the next display.

Now I have to admit I stole the idea from another blog (check it out here) but let's be honest, some of our best ideas are stollen and adapted. So, here's what we did. Each student (roughly 320) was given 1/4 of a circle. They could get as creative as possible and use a bunch of different supplies. Only one challenge, they had ONE forty minute class to accomplish their masterpiece.

 Here is the stack starting to pile high. As you can see from the top one, there were definitely some students who didn't really DIVE in to the exercise. This left me with some extras for students to help me finish when they finished early.

Here's what I did:
     -Draw a large circle on 18x18 paper
     -Cut each sheet into 9x9 squares
     -Set out whatever 2D materials you don't               mind the students using (I wouldn't
      recommend paint) I had markers, crayons             and oil pastels.

That's it! How easy is that! This was perfect for getting students use to class routines and getting the creative juices flowing.

I went a little overboard with my 3D students. I felt a bad having them not do 3D but also wanted them to participate, so left over scraps of "junk" came in handy! Check out the creativity!


Really loving this student group's use of repetition :)

The students really had a fun time with this and I was able to stop them to correct routiney (making words up) behaviors without spending too much time away from the project. That's what I call a win-win. Check out the final display, along with some of my favorite combinations. 

The display spans three walls! SO MUCH ART :) !


Hope you enjoyed and thanks for stopping in!


Thursday, April 23, 2015

My New Love of Metal


I know what you're think, NEW? Yes, new! I've never worked with pliable metal and boy did I have fun when I got to explore the process at a recent professional development. Made me feel a little silly that I've been missing out all these years! 

If you haven't tried working with pliable metal you must give it a try! This material creates an impact, can be molded, embossed, colored, painted, layered and so many more possibilities. This inexpensive material really packs a punch! 

With that long list of possibilities, I wanted to leave my first exploration into teaching pliable metal as open ended as possible. Simple requirement were give to students;
  • Use the metal to demonstrate the concepts of depth (foreground, middle ground, background)
  • Use knowledge of composition to show movement, contrast and whatever else you want to dazzle me with! 
I peppered in some art history to get their wheels-a-turning and then I demonstrated a few techniques for adding texture, pushing metal forward/backward to emphasize space location, and how to add metal to create a 3D effect. What fun the students had. It's a little difficult to see some details because of the shininess of the metal but still check it out!


 Here's a good look at the 3D effect the students got by manipulating the metal


IRON MAN!!!


GIVE IT A TRY!!! Sharpies/metal paint definitely give the most shine but acrylic paint gives a really nice contrast with a matte look. My students also really liked my white paint markers for some added details in white. 

LEARN FROM ME!!! I chose to use hot glue to stick on the extra metal on. Big o' did NOT work! I suggest using E6000 for adding any materials to this unique material.  

Hope you enjoyed! Thanks for stopping in!


Saturday, April 11, 2015

Tatebanko- Japanese diorama making

For the past two years, I have done a unit called "Art and Social Activism" with my 8th grade students. I had only ever seen a unit like this in the high schools and I felt my students could 100% relate to the topics. I have been pleased with just how well my students handle these difficult topics and how much pride they take in their work as they express themselves creatively.

For my 3D Art students, I had them choose a social issue that effects our local community. They researched statistics and local organizations that help those in need throughout the Fox Cities. I was impressed with the wide variety of topics the students chose.

Next we learned about the Japanese art of diorama making. It was a good way to incorporate 3D knowledge of deconstruction, balance, depth and overall structure building.

If you're not familiar with the art behind Tatebankos, check out this cool video! Even if social activism doesn't fit as a unit in your classroom, this is a really fun project for students. It involves a lot of problem solving and is a really fun take on the classic diorama/tunnel book.

Social Issue: Post Traumatic Stress Disorder

Step one was to have students thumbnail sketch their ideas. I urged students to use metaphors/similes. This made the imagery a little more unique and personal. Then using colored pencil they labeled each layer so they had a good idea of what needed to go where and I could see how they understood the concepts of creating depth.

Social Issue: Bullying

Social Issue: Depression

Step Two was to conference with each student on what materials would work best for their idea. Most used chipboard (thin cardboard) with paint or colored pencil. As you can see some students resourced alternative materials like transparency paper, puzzle pieces, etc. 

Social Issue: Mental Illness (primarily schizophrenia) 


Social Issue: Depression
To create the "cloud" around the cool colored person this student used sandpaper to create texture on transparency paper! Super fun!

Social Issue: Bullying

Social Issue: Pollution

Social Issue:Bulimia/Anorexia

The final step was layering their pieces on the base and finally building the box. Some students made full boxes and some chose to leave the top off to allow a little more light in. A few students even utilized black light to give their piece a "darker" feel! 

I can't express how happy I am with the outcome of this project. It was exciting to problem solve along side my students and to encourage all their amazingly creative ideas. Each Tatebanko turned out a little different and that is a beautiful thing! These were a hit at our "Art and Social Activism" art show!

Hope you enjoyed! Thanks for stopping in!

Tuesday, April 15, 2014

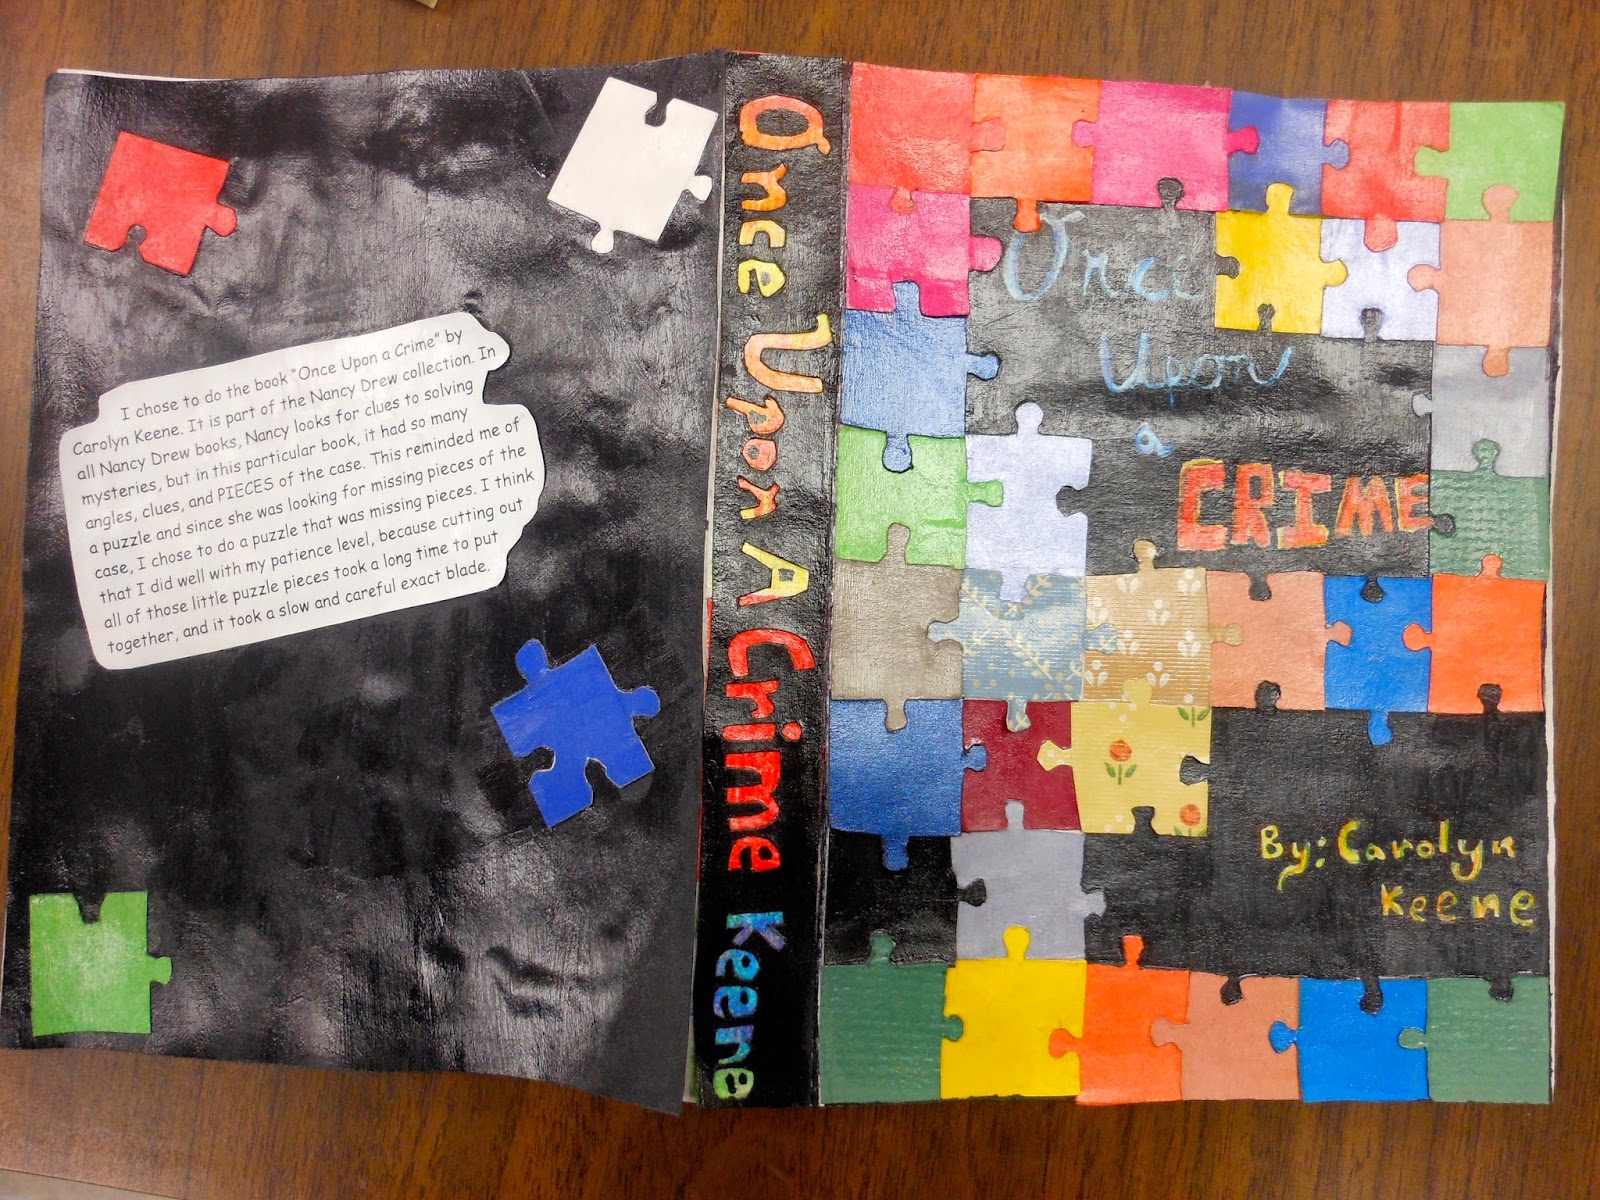
Book Covers- A Lesson in Graphic Design

This year I've been exploring different artist careers with my 8th graders. Graphic Design was a clear choice. There are 100's of fun projects that I could have done and my love of typography and minimalist graphics brought me 1000s of ideas (with a little help from Pinterest). Then I remembered seeing this series of book covers http://www.sinch.us/classic-childrens-stories-vol-1/  and a project was born. Also a fun way to tie in some of those literacy goals!

My students were asked to come up with a new cover for one of their favorite books. I started them off with a lesson on typography and layout,  and let them run from there. They had a choice of colored pencil, paper layering or collage as their materials. My 8th graders just love open ended projects!  Instead of the classic book description on the back cover, I had the students include their artist statements.


Sorry for the shiny photos. Some students used mod-podge to give their book cover a glossy look


Charlotte's Web creator used newspaper words to create a web, which symbolized Charlotte's use of words taken from newspaper in the book


One of the only students who decided to do the inside folds as well :)


I encouraged my students to create a layout that flowed well between the front, spine and back portions of their covers. If you're interested in trying this project in your class, here are the dimensions I gave my students for creating the different components of the cover. Fit standard book for display :) Add extra inches to the length (20") if you want your students to have extra space for practice. I left this a choice for my students.